Zero to Hero: Building Your First Bot with No-Code on Cornblue

The era of hiring expensive developers to build business automation is over. With Cornblue, you can architect a sophisticated, multi-language chatbot without writing a single line of code. Our visual canvas turns complex logic into a simple "connect-the-dots" experience.
Follow this step-by-step guide to launch your first "Awesome Bot" in minutes.
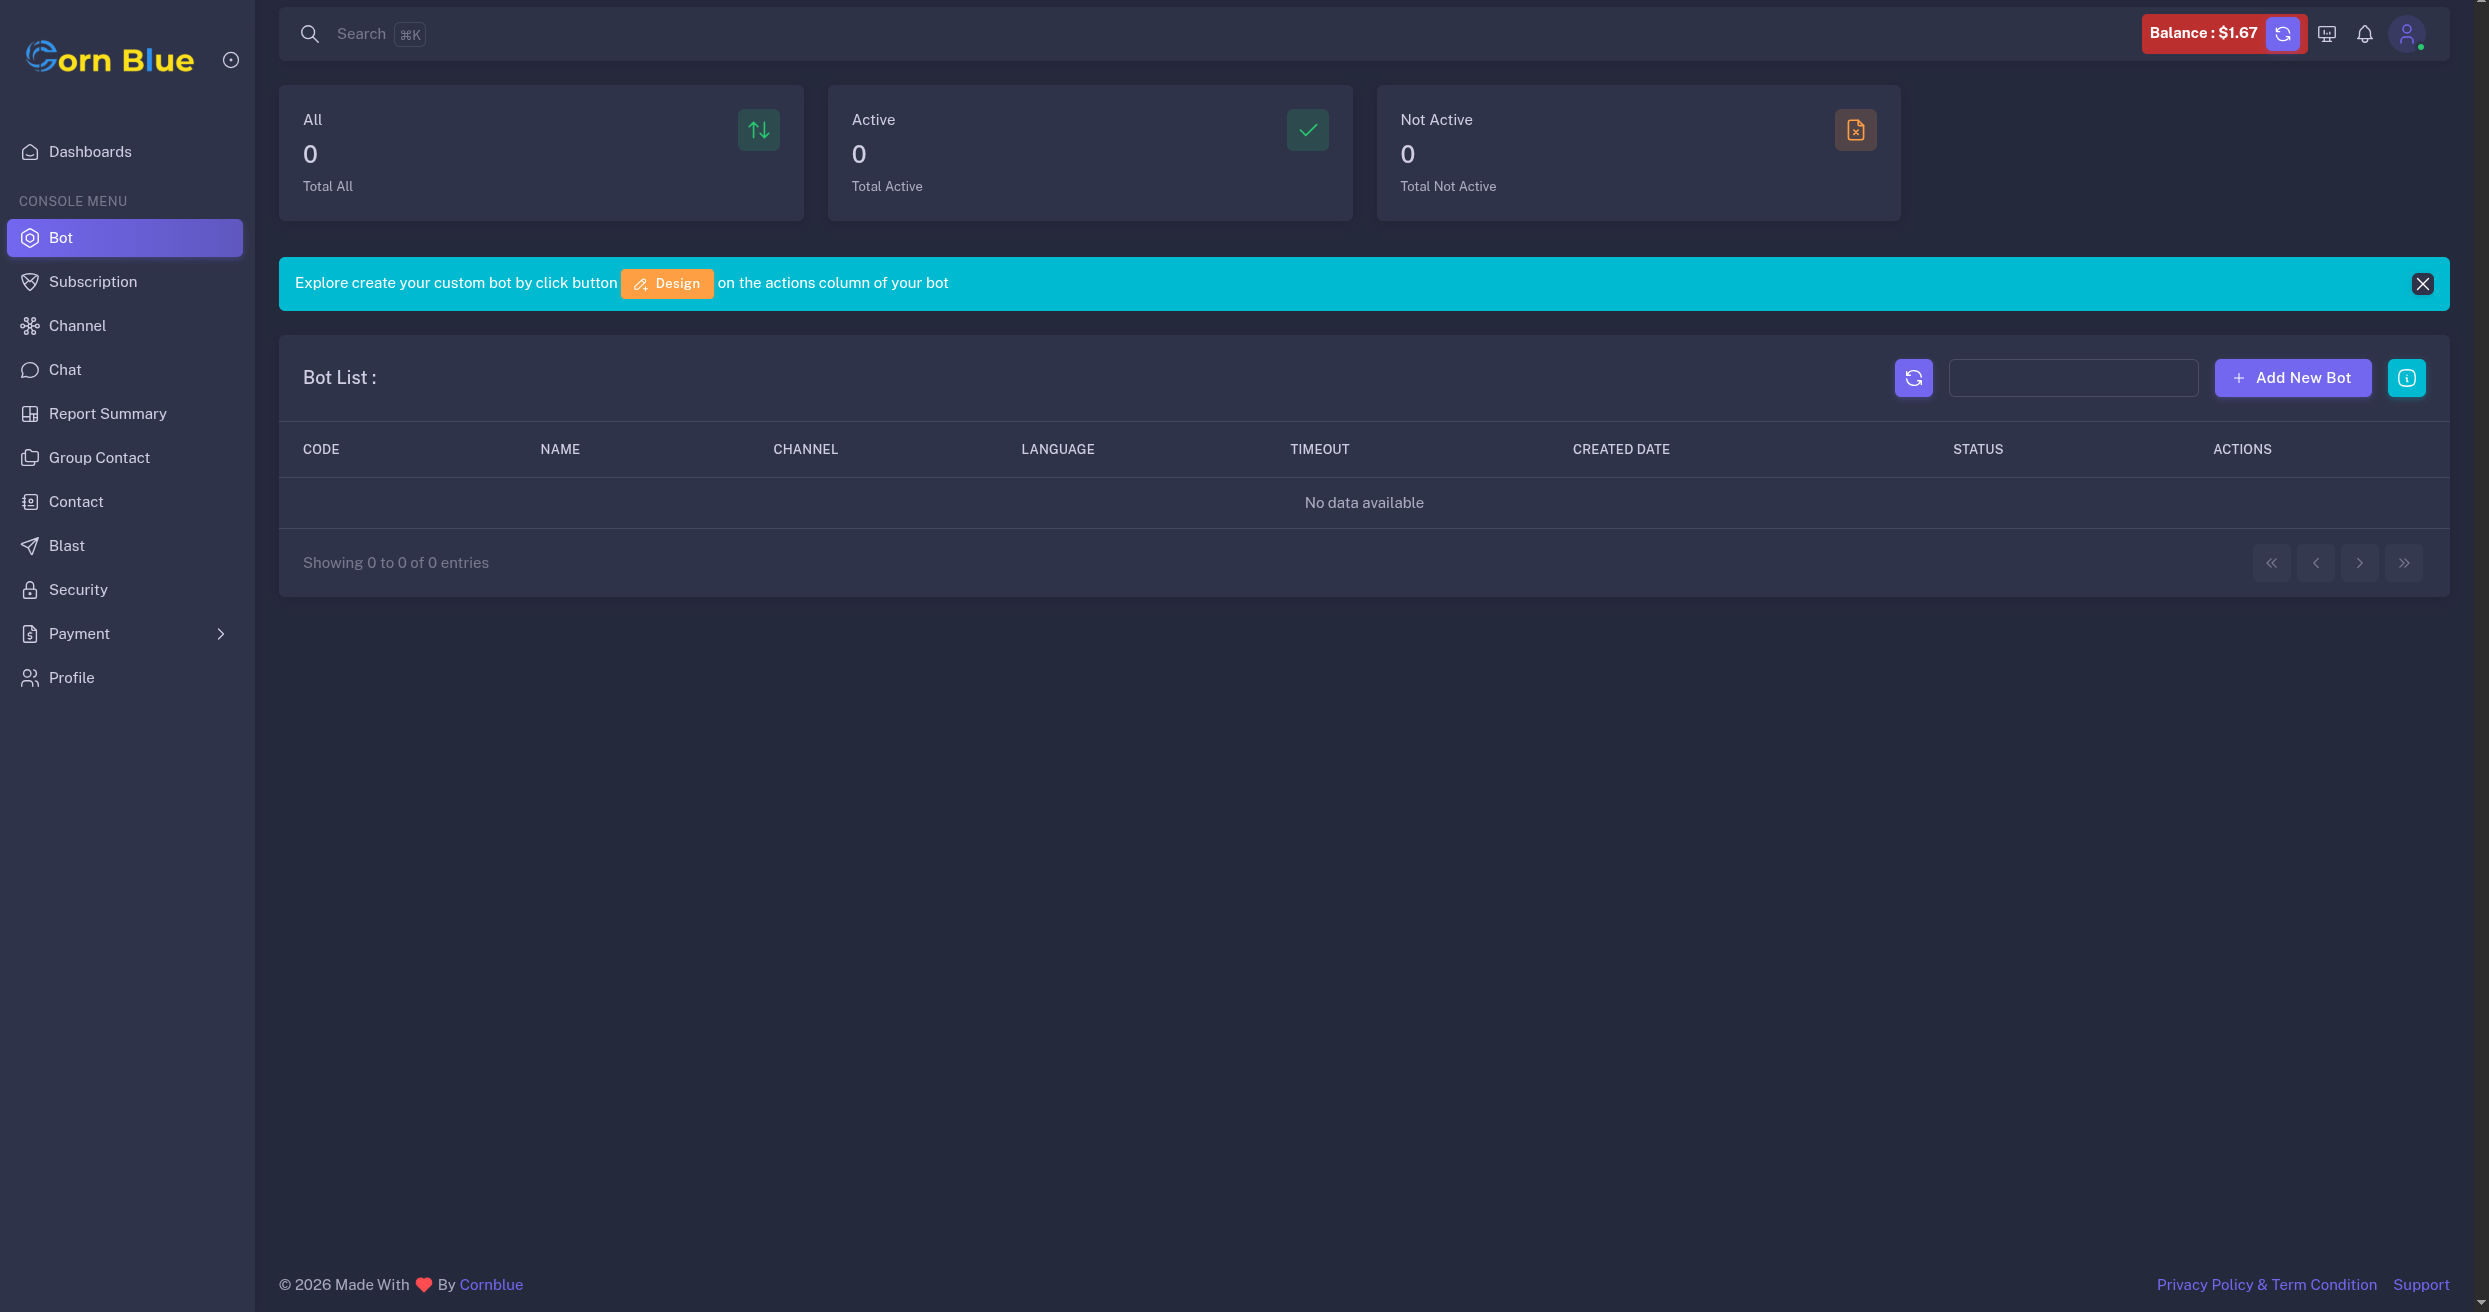
Step 1: Initialize Your Bot
Getting started is easy. From your dashboard, you can either:
- Navigate to the Bot Menu.
- Click the prominent green button: "Build First My Awesome Bot."
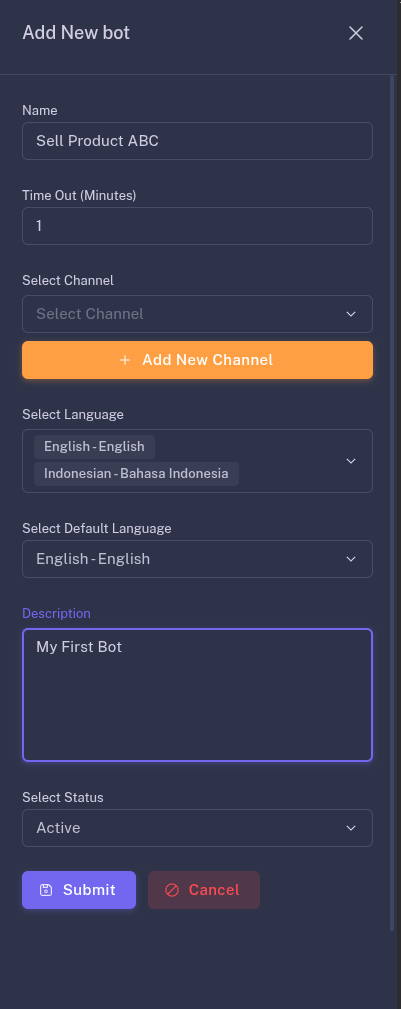
Once the form appears, give your bot a name. If you have already set up a channel (like WhatsApp or Webchat), select it now. If not, don't worry—you can leave it empty and connect it later.
Step 2: Language & Localization
Cornblue is built for a global audience.
- Select the list of languages your bot should support.
- Set your Default Language (this is the language the bot will use when a customer first starts a chat).
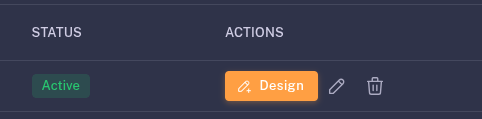
Step 3: Entering the Design Canvas
Once created, click on your bot to enter the Design Canvas.
- Pro Tip: Pay attention to the on-screen guidance. A set of instruction guidelines will pop up to explain how the canvas nodes work.
- Use the icons in the top-right corner to switch your pointer options (Select, Pan, or Link).
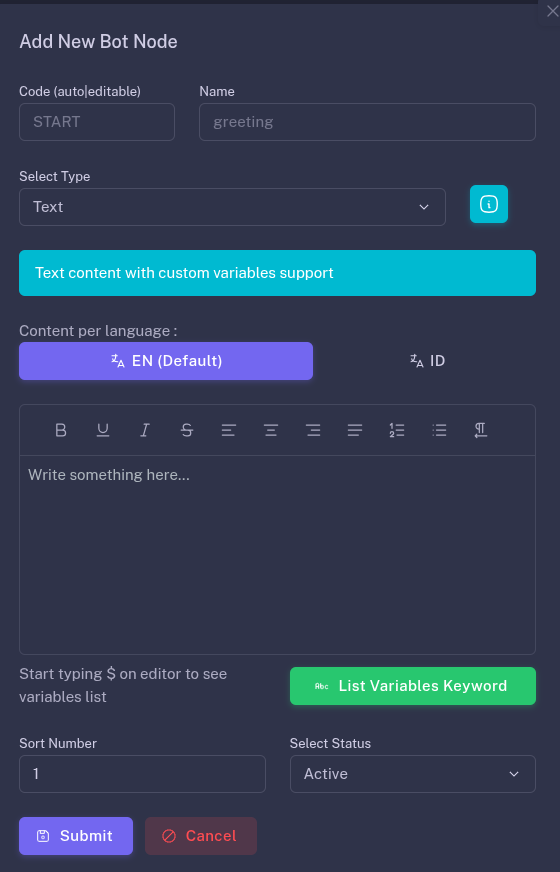
Step 4: Adding Your First Nodes
Click the "Add Node" button to bring your bot to life. A detailed instruction form will appear for each node type.
Note: Read the instructions until the last slide! It explains how to correctly configure the logic for each specific node.
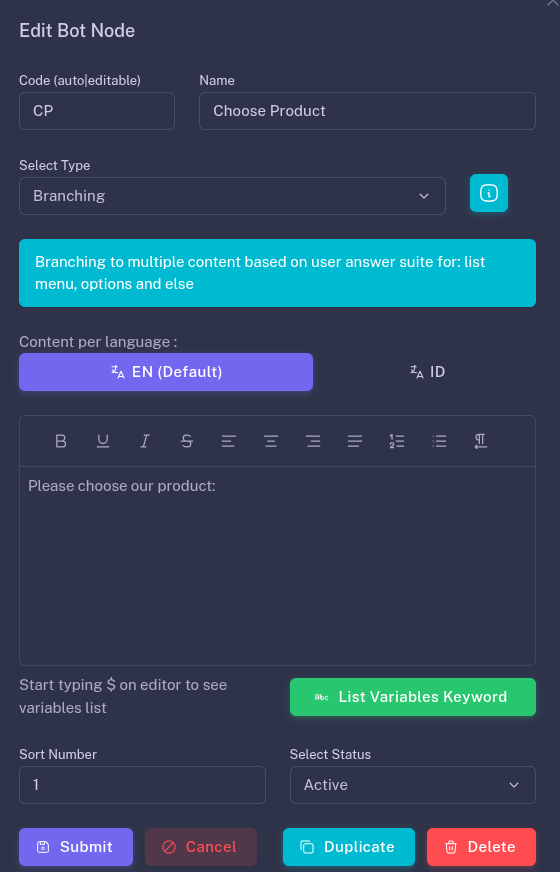
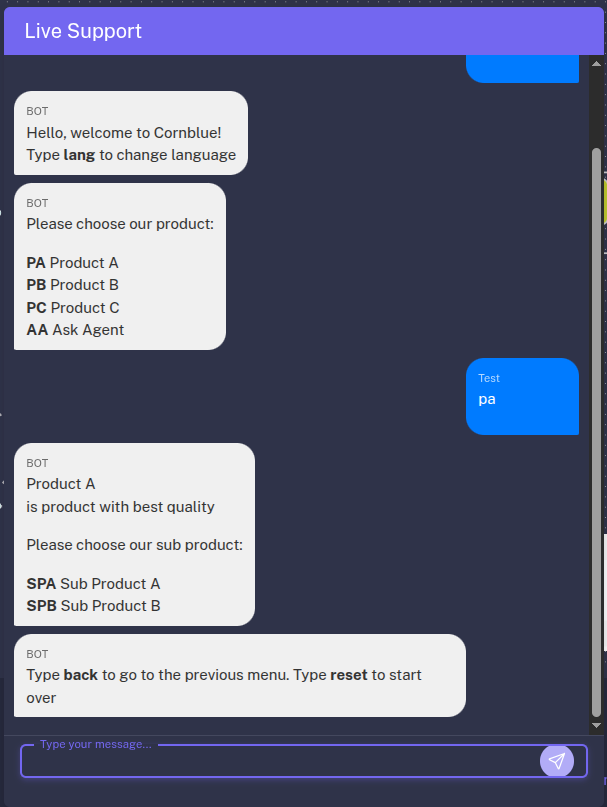
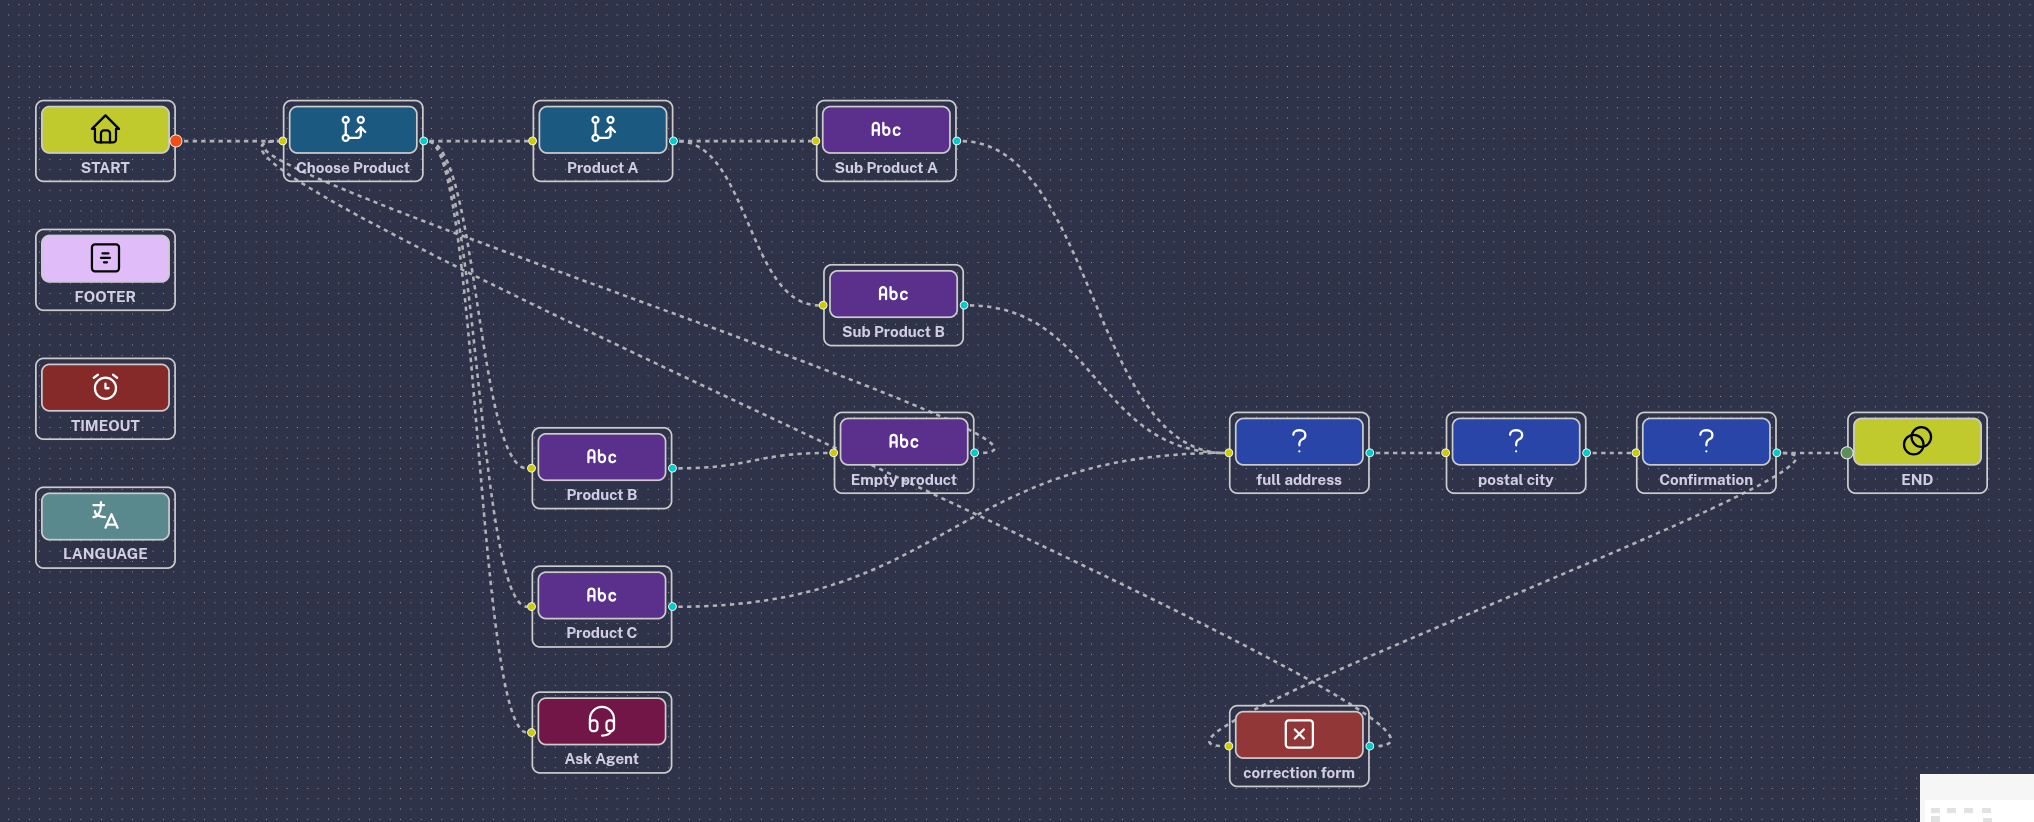
Step 5: Building a Menu with "Branching"
To give your customers options, create a Branching Node.
- Fill in the node name and the content for each language you selected.
- This node will act as your "Main Menu" (e.g., "Choose a Product").
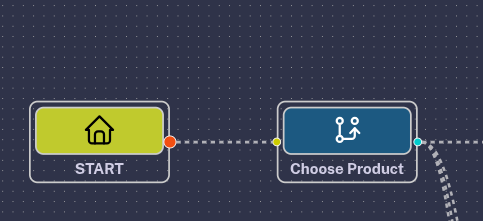
Step 6: Connecting the Logic
Now, create Text Nodes for your specific products or services.
- The Magic Link: Click and drag the "edge" from your Branching Node to your Text Nodes.
- This creates the sequence: when a customer picks an option from the menu, the bot knows exactly which text node to trigger next.
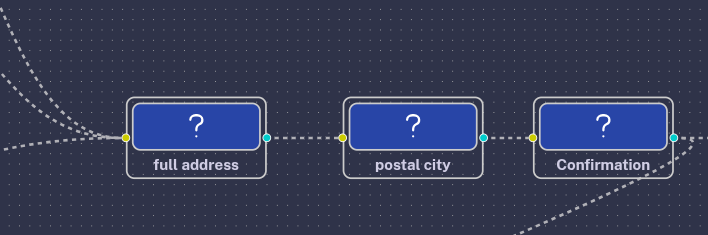
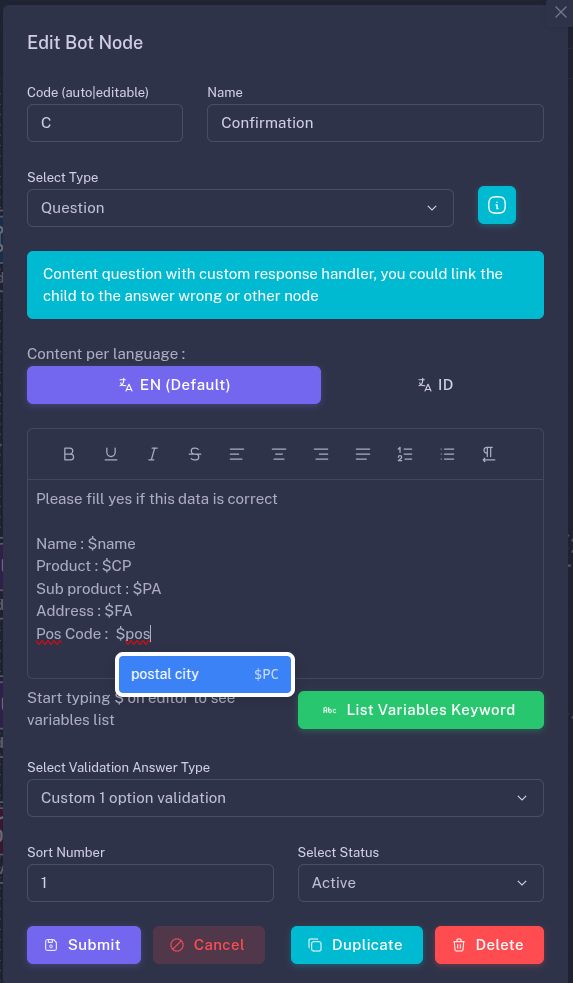
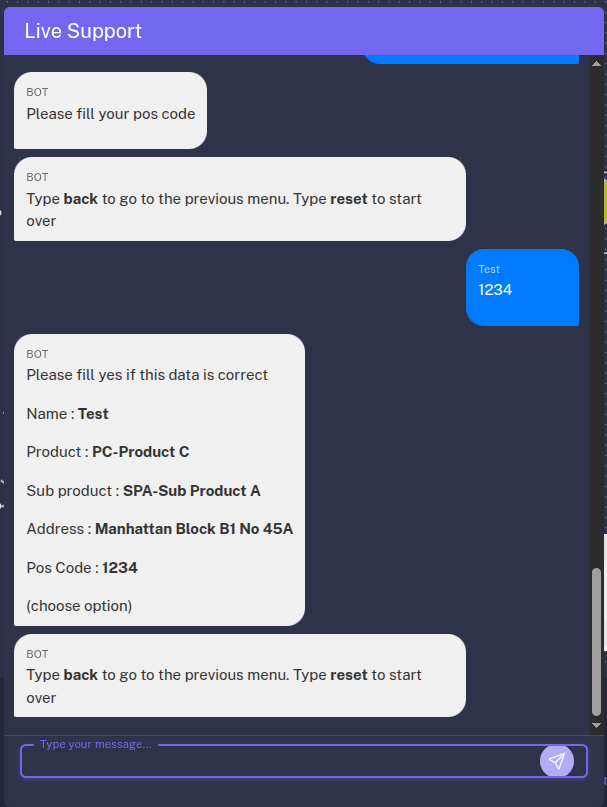
Step 7: Capturing Data with "Question" Nodes
To take orders or registrations, use the Question Node. You can ask for:
- Delivery Address
- Postal Code
- Email or Phone Number
Smart Feature: Auto-Complete Variables Want to repeat a customer's name or address back to them? In any text field, simply press the "$" key or click the Green Variable Button. This allows the bot to use data it previously collected, making the conversation feel personalized and professional.
Step 8: Final Review & Testing
Before you go live, take a bird's-eye view of your canvas.
- Re-arrange: You can move nodes around to keep your workspace clean.
- Verify Edges: Ensure every node is connected to an "edge." A disconnected node is a dead end for your customer!
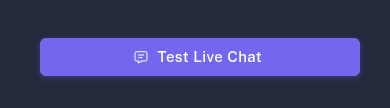
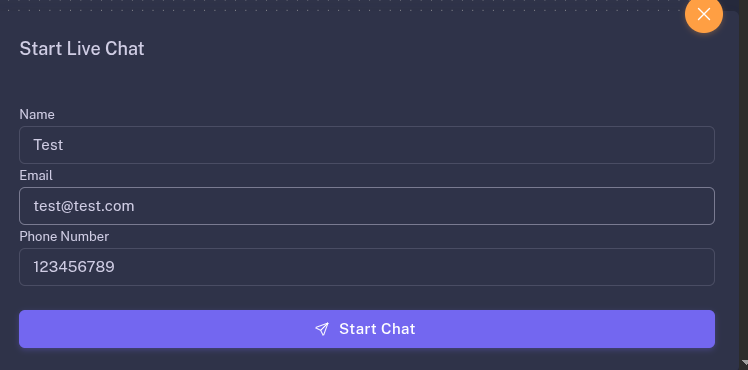
- Test the Flow: Use the internal testing tool to run through the conversation exactly as a customer would.
Video full tutorial Cornblue - create your first bot:
Why Choose No-Code with Cornblue?
- Speed: Go from idea to deployment fast process.Visual Logic: See exactly how your customers move through your funnel.
- Infinite Scaling: Start with a simple greeting and grow into a multi-level product catalog with hundreds of branches.
The canvas is ready for your ideas. Start Building Your Awesome Bot today!